基本技术栈:GithubPages+Github Action+Hugo+PaperMod主题
首先安装Hugo、git和创建xxx.github.io仓库,这里不做赘述。
启动 Hugo# Create a New Site创建新站点# hugo new site theplaybook -f yml
Run hugo new site <site_name>. This will create a directory <site_name> containing the hugo templates. Pass in the optional -f yml option to override the default toml files used for configuration.
运行这个命令来创建一个包含hugo模板的目录,并且重写config.toml文件
Install theme安装主题# 1
2
3
git init
git clone https://github.com/adityatelange/hugo-PaperMod themes/PaperMod --depth= 1
git submodule add --depth= 1 https://github.com/adityatelange/hugo-PaperMod.git themes/PaperMod
Run git init on the root of the project to initialize a Git repository We will install the PaperMod theme. Use the two commands above from the instructions here Or choose a theme from the hugo themes Add theme: PaperMod to your config.yml Configure Github Actions to Publish to the Github Pages# 配置Github Actions和Github Pages
Create a Git repository and initialize Git# 1
2
3
4
5
6
echo "# README" >> README.md
git add .
git commit -m "first commit"
git branch -M main
git remote add origin <path_to_your_git_repo>
git push -u origin main
Create a repository on Github, create a readme file, add the remote address, and push your first commit 上传时需要提供github personal access token,可以自己搜教程生成。
暂时还不能用带有workflow的token上传,否则报错:Error in the HTTP2 framing layer。
之后推送分支得用github CI/CD构建workdlows之后得生成勾选workflow的token,否则报错如下错误 refusing to allow an OAuth App to create or update workflow {0} without workflow scope这个错误是说,因为 OAuth 的应用没有指定 workflow 范围,所以无法推送带有更新 workflow 的分支。
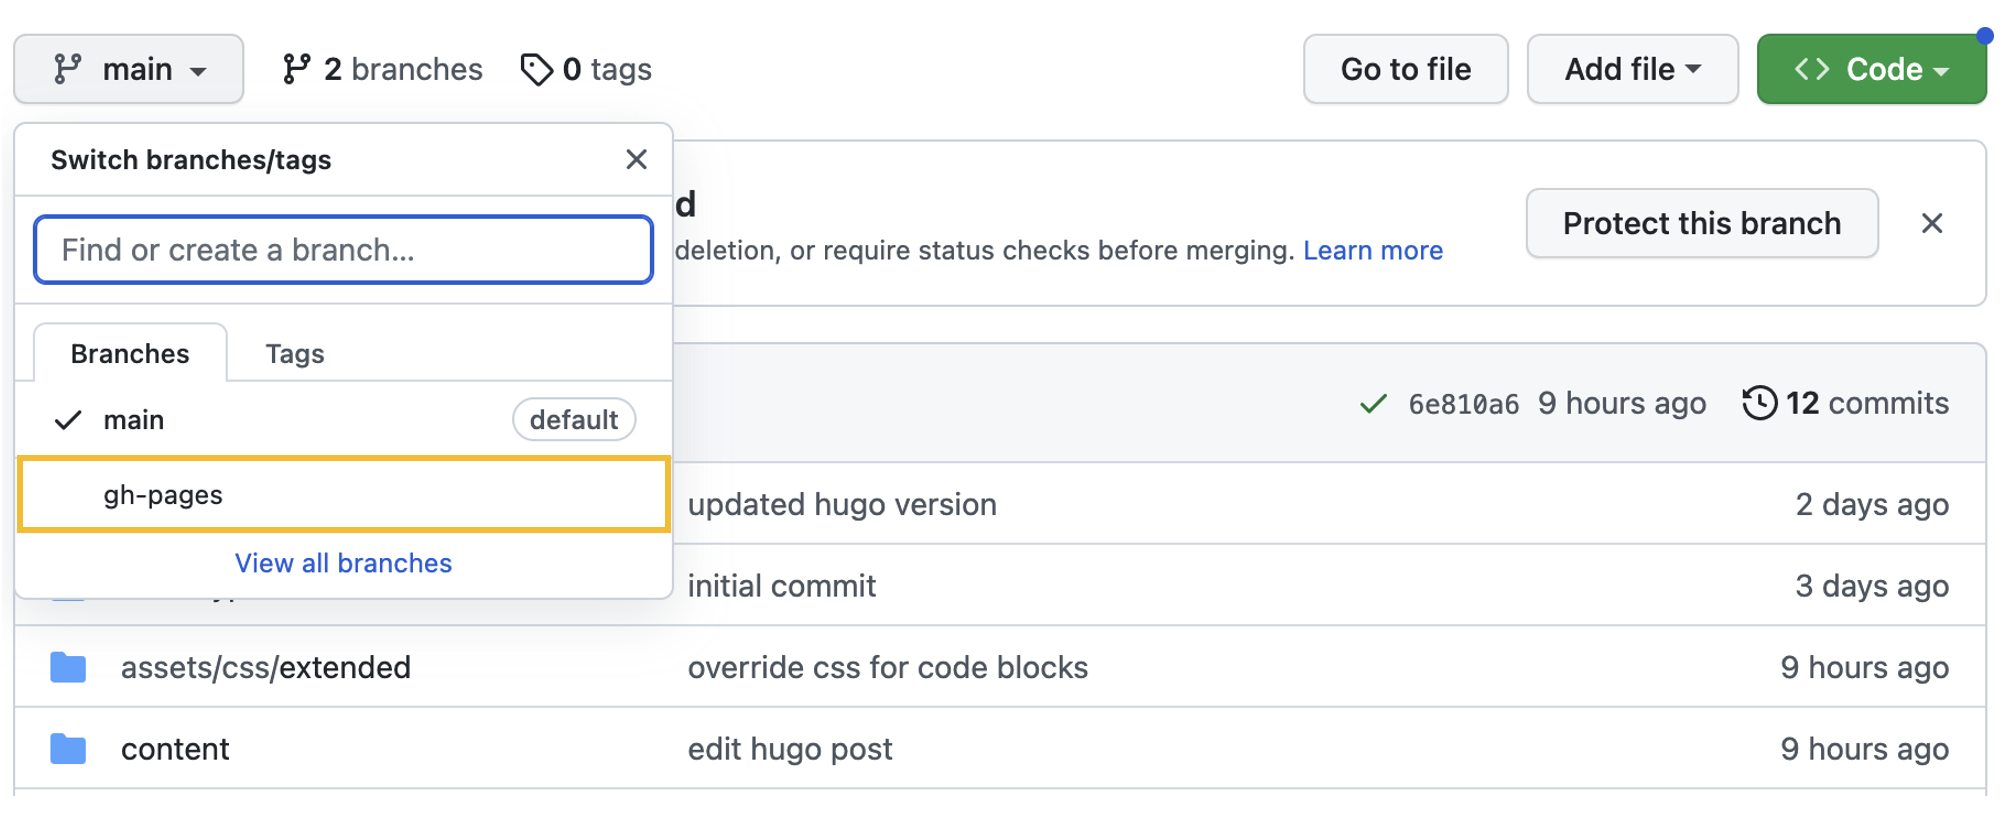
Manually Add the gh-pages Branch# 手动创建gh-pages分支
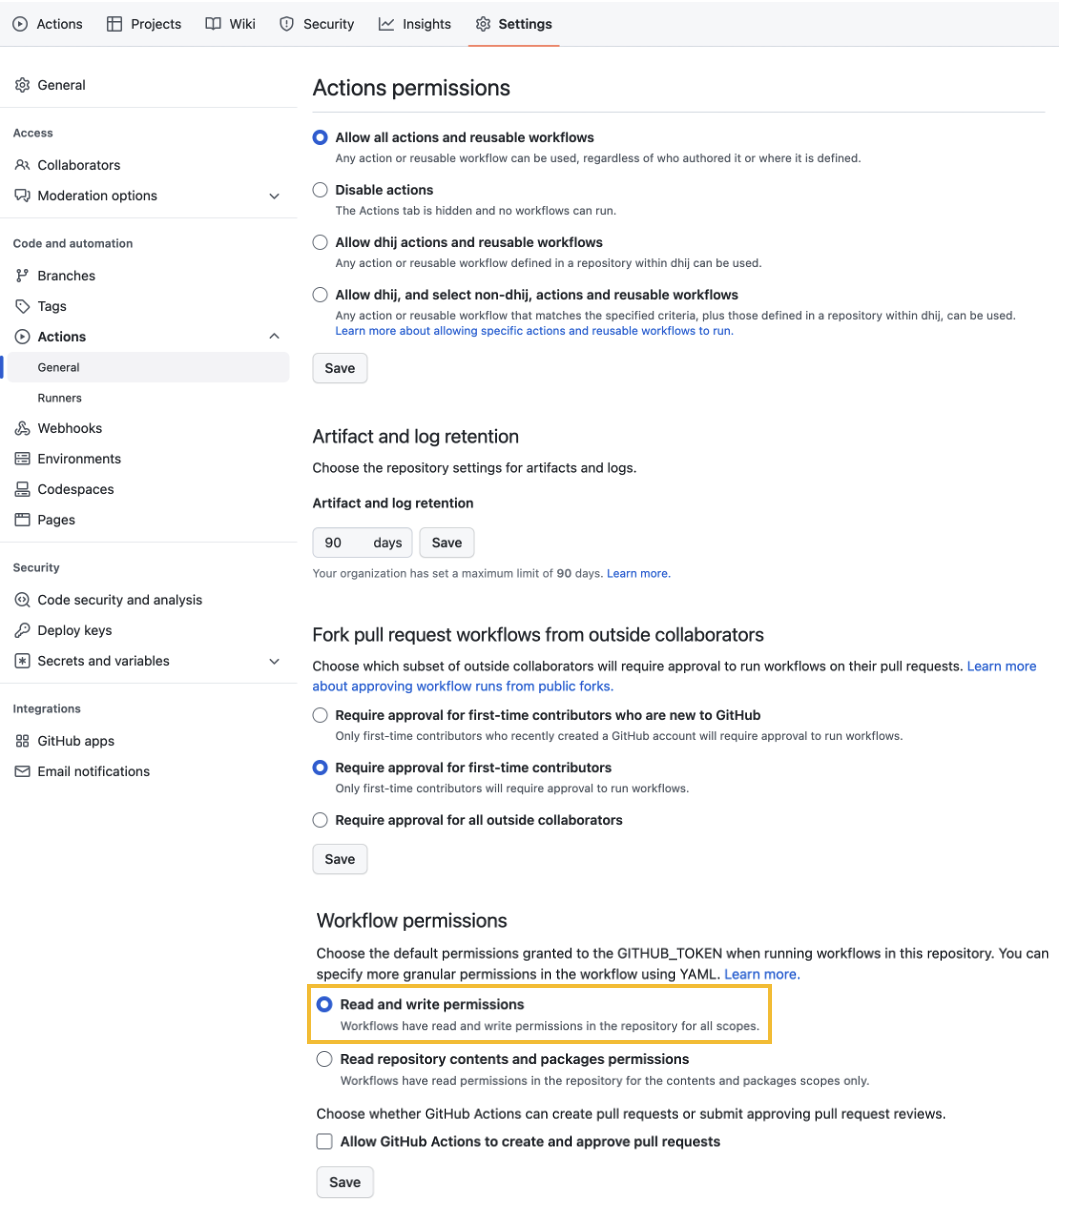
Manually add the gh-pages branch to the repository; otherwise the github actions will throw an error Allow Read and Write Permissions on the Workflow# 授予读写权限
Allow read and write permissions under Settings > Actions > General > Workflow permissions Add a .github/workflows/deploy.yml file under the project root directory# 在repo根目录下创建deploy.yml文件来启动Github Action,具体代码:
1
2
3
4
5
6
7
8
9
10
11
12
13
14
15
16
17
18
19
20
21
22
23
24
25
26
27
28
29
30
31
32
33
34
35
36
37
38
39
40
41
42
43
44
45
46
47
48
49
50
51
52
# 工作流的名称
name : hugo-deploy
# 触发事件
on :
# 当你向主分支 main 推送了代码时触发此工作流
push :
paths-ignore :
- "images/**"
- "LICENSE"
- "README.md"
branches :
- main
workflow_dispatch :
jobs :
deploy :
runs-on : ubuntu-latest
steps :
- name : Git checkout
uses : actions/checkout@v2
with :
ref : main
submodules : true
fetch_depth : 1
- name : Get Theme
run : git submodule update --init --recursive
- name : Update theme to Latest commit
run : git submodule update --remote
#- name: Setup Hugo
# run: |
# curl -L -o /tmp/hugo.tar.gz 'https://github.com/gohugoio/hugo/releases/download/v0.110.0/hugo_extended_0.110.0_linux-amd64.tar.gz'
# tar -C ${RUNNER_TEMP} -zxvf /tmp/hugo.tar.gz hugo
#- name: Build
# run: ${RUNNER_TEMP}/hugo --theme=PaperMod --buildDrafts
- name : Setup hugo
uses : peaceiris/actions-hugo@v2
with :
hugo-version : "0.83.0"
- name : Build
run : hugo --theme=PaperMod --buildDrafts --gc --verbose --minify
- name : Deploy
uses : peaceiris/actions-gh-pages@v3
with :
github_token : ${{ secrets.GITHUB_TOKEN }}
publish_dir : ./public
更新config.yml文件# 尤其是更新baseURL对应的参数
Note: the content will be deployed to https://<username>.github.io/<repository_name>/ by default if not configured otherwise. Update the base_url in config.yml to "https://<username>.github.io/<repository_name>/"
等等就能发现自动化部署被成功实现!!!
之后的主题具体配置可以参考# Hugo搭建个人博客
配置评论系统# 参考资料# Hugo博客添加utterances评论
1.在github创建一个公共 代码仓库用于保存个人博客的评论内容,例如我创建了comments_of_blog
2.进入utterances app
3.编辑 comments 配置
建议在根目录layouts\partials下创建comments.html文件并编辑:
1
2
3
4
5
6
7
8
9
10
11
12
13
14
15
<!-- github comments -->
< div >
< div class = "pagination__title" >
< span class = "pagination__title-h" style = "font-size: 20px;" > 评论</ span >
< br />
</ div >
< div id = "tcomment" ></ div >
< script src = "https://utteranc.es/client.js"
repo = "添加你的个人评论仓库名称"
issue-term = "title"
theme = "github-light"
crossorigin = "anonymous"
async >
</ script >
</ div >
4.编辑 config.yml 配置#
在params下添加:
1
2
3
4
5
utteranc :
enable : true
repo : "添加你的个人评论仓库名称"
issueTerm : "title"
theme : "github-light"
要使评论区颜色和文本区颜色保持一致,可以参考# hugo添加utterances🔮评论系统
Hugo添加不蒜子Busuanzi站点访问量与阅读量统计# 添加不蒜子站点访问量统计
对任意hugo主题均适用,只需要改4个地方,下面以papermod主题为例。
head# 找到主题文件夹内的head.html,例如papermod的路径为themes/PaperModX/layouts/partials/head.html
添加如下代码
1
2
3
4
5
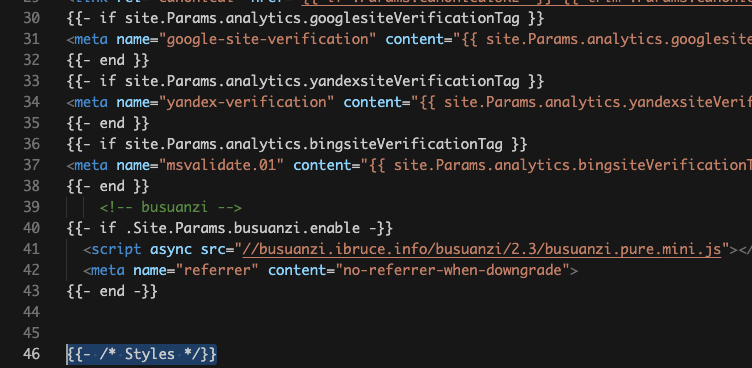
<!-- busuanzi -->
{{- if .Site.Params.busuanzi.enable -}}
< script async src = "//busuanzi.ibruce.info/busuanzi/2.3/busuanzi.pure.mini.js" ></ script >
< meta name = "referrer" content = "no-referrer-when-downgrade" >
{{- end -}}
可以添加在google-site-verification那块后面,Styles前面,方便寻找
在站点底部显示总访问量与访客数,一般和head同目录,添加如下代码,注意添加在<footer>代码块里
1
2
3
4
5
6
7
8
9
10
11
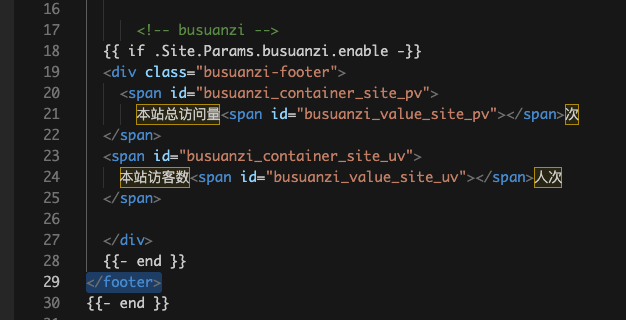
<!-- busuanzi -->
{{ if .Site.Params.busuanzi.enable -}}
< div class = "busuanzi-footer" >
< span id = "busuanzi_container_site_pv" >
本站总访问量< span id = "busuanzi_value_site_pv" ></ span > 次
</ span >
< span id = "busuanzi_container_site_uv" >
本站访客数< span id = "busuanzi_value_site_uv" ></ span > 人次
</ span >
</ div >
{{- end -}}
single# 用于显示每篇文章阅读量,有的主题是和上面两个同目录,有的不是,自己搜索下,papermod是在themes/PaperModX/layouts/_default/single.html,一样注意加在<header>代码块内
1
2
3
4
<!-- busuanzi -->
{{ if .Site.Params.busuanzi.enable -}}
< span id = "busuanzi_container_page_pv" > 本文阅读量< span id = "busuanzi_value_page_pv" ></ span > 次</ span >
{{- end }}
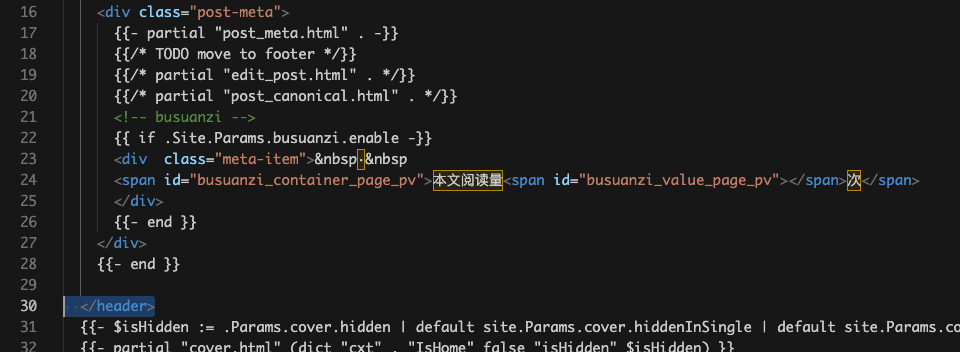
这里要根据不同主题自己改动,如papermod是在post-meta这块,为了套用它的颜色和格式在外面套了<div>,加了个分隔符
1
2
3
4
5
6
<!-- busuanzi -->
{{ if .Site.Params.busuanzi.enable -}}
< div class = "meta-item" > & nbsp·& nbsp
< span id = "busuanzi_container_page_pv" > 本文阅读量< span id = "busuanzi_value_page_pv" ></ span > 次</ span >
</ div >
{{- end }}
config# 回到根目录改config.yml,在params里加上两行
1
2
3
params :
busuanzi :
enable : true
不想显示统计改成false就行了
如果是toml的配置文件自己按格式改就行,属性都一样
全站
单页
效果如上
自定义域名# 自定义域名可以参考[这篇文章](theplaybook 的下半部分。
Link Custom Domain to Github Pages#
Add your custom domain under your Git repository’s Settings > Pages > Custom Domain as shown in the image above. Note: the DNS check will initially be unsuccessful
Configure an apex domain by adding IP addresses for Github Pages as instructed here . As recommended there, set up a www subdomain as well by creating a CNAME record that points to <username>.github.io. If you are using Namecheap, you will have records that look something like the image above. The instructions are available here 1
baseurl : "http://theplaybook.dev/"
Update the baseurl in config.yml with your domain. Please note that the HTTPS is enforced through Github Pages Once the commit for the baseurl change is pushed, the Github Action will run the deploy job and you should be able to access the site via your custom domain. It might take some time for your DNS provider to update your domain and the newly-created records to take effect.
SEO搜索引擎优化# 一般来说,Google搜索不到GitHub Pages上的内容,需要自行进行搜索引擎优化(SEO),具体设置过程可以参照下面这个视频。
VIDEO
The following worked for me:
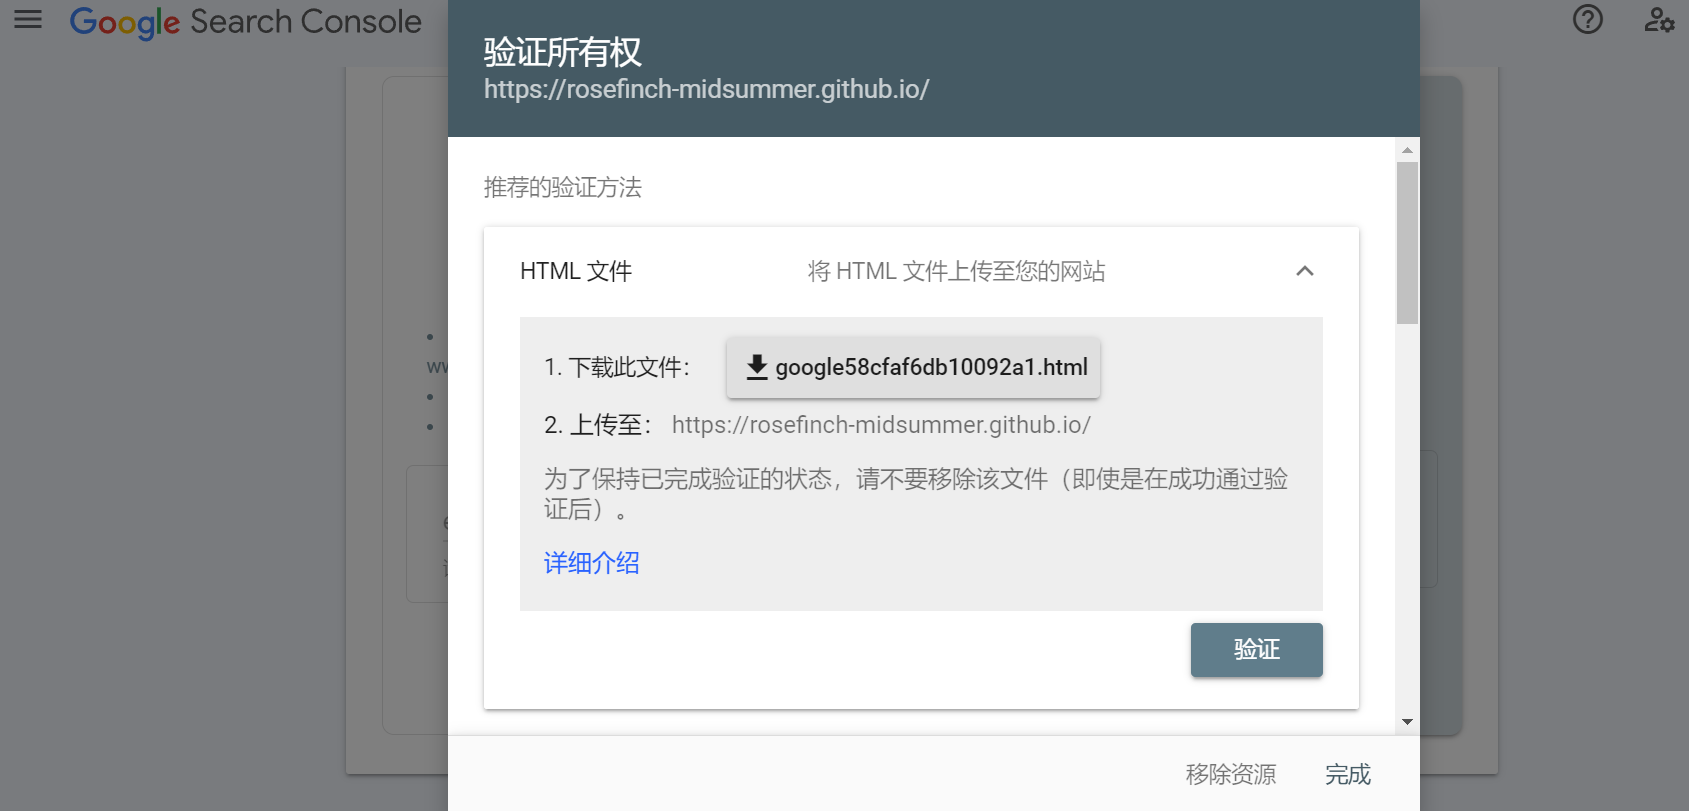
Go to Google console: https://search.google.com/search-console/welcome Paste your GitHub website address in the “URL prefix” window. Download the HTML verification file. Upload such file in your website. IMPORTANT: Wait for some time and then click on “verify” in back in Google console.
选右边的这个,然后验证所有权,任选一种方式即可
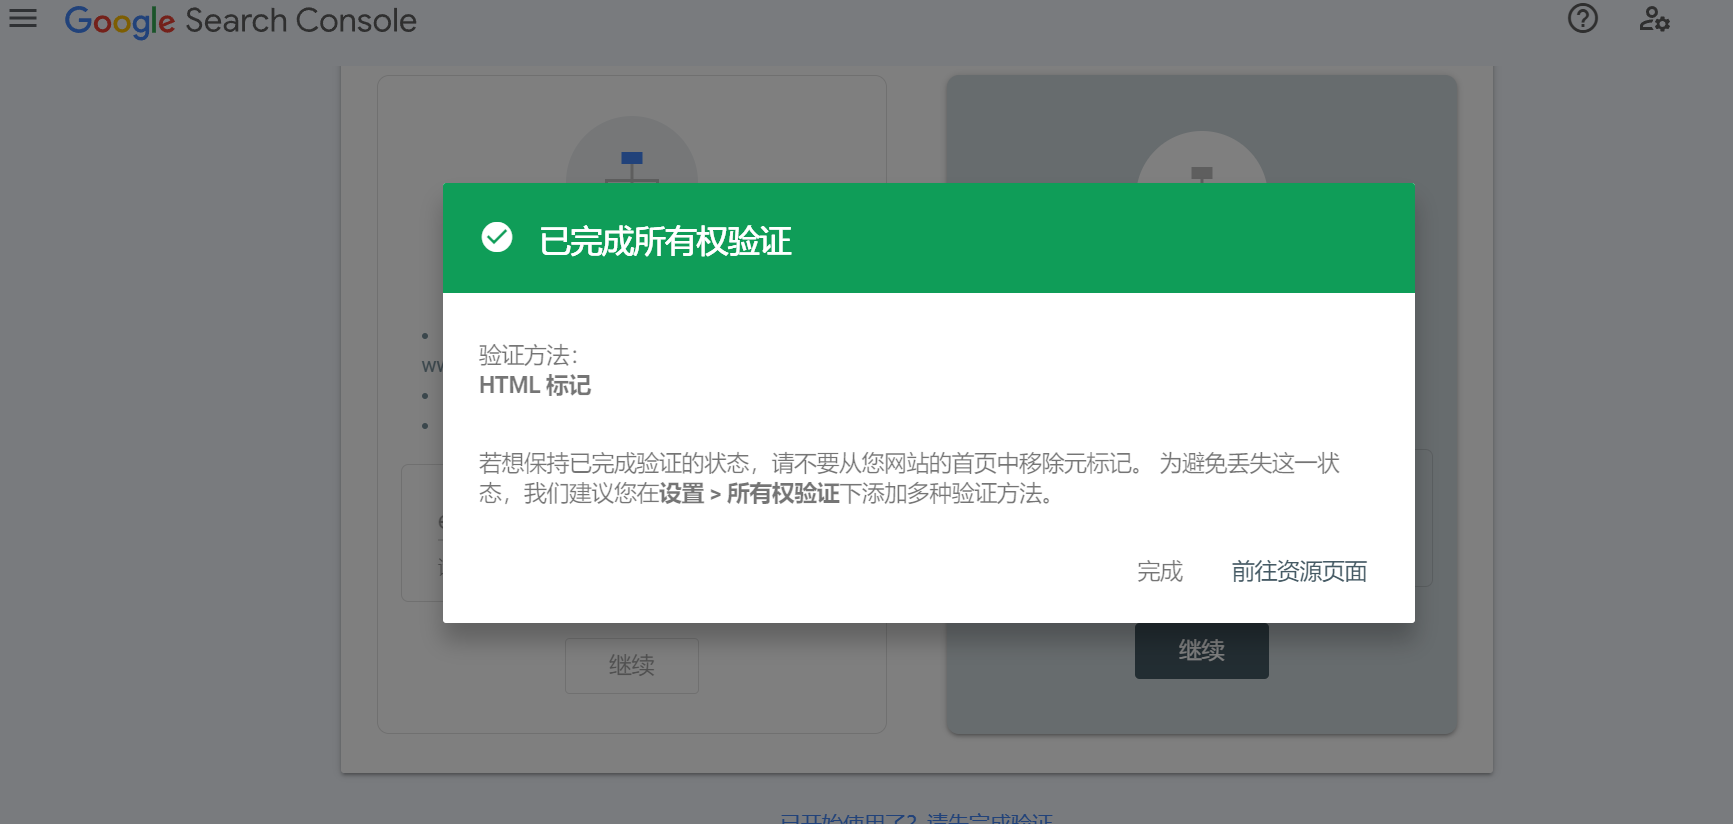
验证成功然后前往资源页面
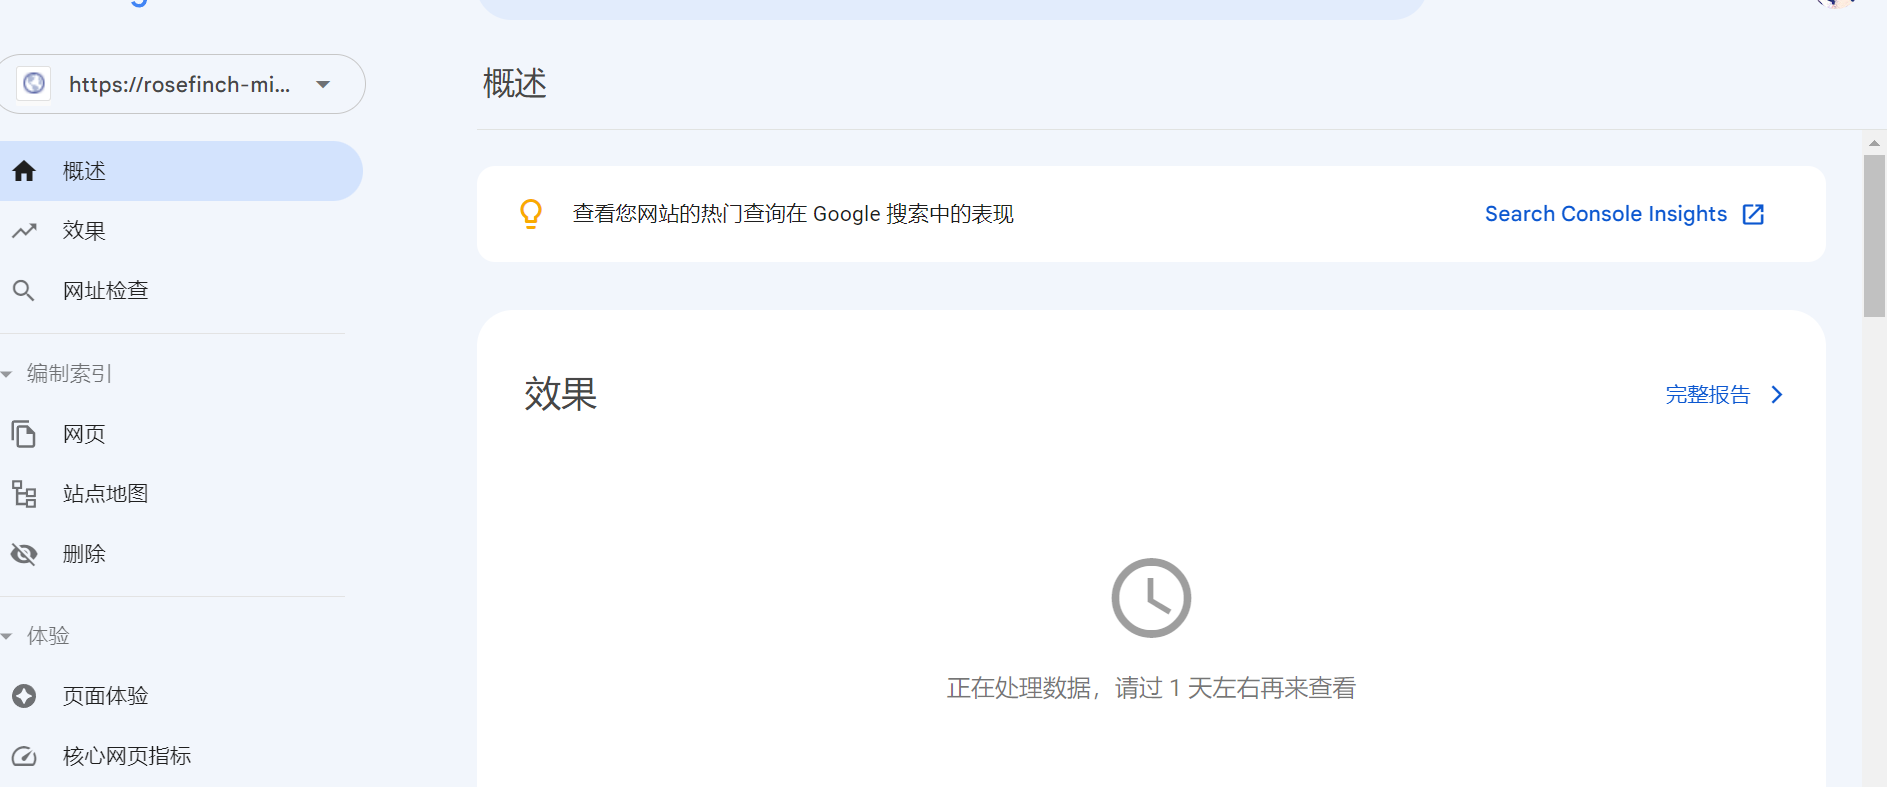
大概得等一周左右才能搜索成功。
优雅地使用数学公式# 启用Katex
PaperMod 在这方面没整合,需要自行设置,但是有官方说明文章 Math Typesetting ,和几个 issue,具体步骤如下:
新建 /layouts/partials/math.html 粘贴下面的代码 1
2
3
4
5
6
7
8
9
10
11
12
13
14
15
16
17
18
19
< link rel = "stylesheet" href = "https://cdn.jsdelivr.net/npm/katex@0.15.1/dist/katex.min.css" integrity = "sha384-R4558gYOUz8mP9YWpZJjofhk+zx0AS11p36HnD2ZKj/6JR5z27gSSULCNHIRReVs" crossorigin = "anonymous" >
< script defer src = "https://cdn.jsdelivr.net/npm/katex@0.15.1/dist/katex.min.js" integrity = "sha384-z1fJDqw8ZApjGO3/unPWUPsIymfsJmyrDVWC8Tv/a1HeOtGmkwNd/7xUS0Xcnvsx" crossorigin = "anonymous" ></ script >
< script defer src = "https://cdn.jsdelivr.net/npm/katex@0.15.1/dist/contrib/auto-render.min.js" integrity = "sha384-+XBljXPPiv+OzfbB3cVmLHf4hdUFHlWNZN5spNQ7rmHTXpd7WvJum6fIACpNNfIR" crossorigin = "anonymous" ></ script >
< script >
document . addEventListener ( "DOMContentLoaded" , function () {
renderMathInElement ( document . body , {
// customised options
// • auto-render specific keys, e.g.:
delimiters : [
{ left : '$$' , right : '$$' , display : true },
{ left : '$' , right : '$' , display : false },
{ left : '\\(' , right : '\\)' , display : false },
{ left : '\\[' , right : '\\]' , display : true }
],
// • rendering keys, e.g.:
throwOnError : false
});
});
</ script >
在 /layouts/partials/extend_head.html中添加下面的代码 1
2
3
{{ if or .Params.math .Site.Params.math }}
{{ partial "math.html" . }}
{{ end }}
config.toml 中添加 enableInlineShortcodes = true每篇文章的参数中设置 math: true 但因为markdown和katex代码有些冲突,上面的功能只能显示一行公式,无法显示多行公式。要显示多行公式可以参考# Hugo中优雅地使用数学公式
部分主题提供了能够保持内容不受转义的shortcode,例如LoveIt/FitIt提供的的shortcode,将公式块包围在这个shortcode之间就可以避免被渲染器转义。
如果主题并没有提供类似的shortcode,可以自己创建。参考hugo关于创建shortcode的文档 ,创建layouts/shortcodes/keepit.html并写入如下内容:
1
{{- .Inner | safeHTML -}}
然后可以在markdown中将公式使用上述shortcode包围:
这样公式就不会被转义,能够正常被mathjax/katex解析。
使用shortcode也是目前最方便,应用最广的方法。
但是这种方法在markdown源文件中额外引入了shortcode这一非原生语法,在使用typora等其他markdown编辑器查看和编辑时视觉体验较差。
在线阅读pdf文件# 这个功能可以参考用pdfjs在线预览pdf书籍教程
修改文章头部信息# 添加字数统计# Papermod模板自带的工具无法统计汉字字数,需要自行配置。
在 layouts/partials/post_meta.html 文件中,添加下面的代码:
 1
 2
 3
 4
 5
 6
 7
 8
 9
10
11
12
13
14
15
16
17
18
19
20
21
22
23
24
25
26
27
28
29
30
{{- $scratch := newScratch }}
<!-- 创建时间 -->
{{- if not .Date.IsZero -}}
{{- $scratch.Add "meta" (slice (printf "创建: < span title = '%s' > %s</ span > " (.Date) (.Date.Format (default "January 2, 2006" .Site.Params.DateFormat)))) }}
{{- end }}
<!-- 更新时间 -->
{{- if (.Param "ShowLastMod") -}}
{{- $scratch.Add "meta" (slice (printf "更新: %s" (.Lastmod.Format (.Site.Params.dateFormat | default "2006-01-02")))) }}
{{- end }}
<!-- 统计字数 -->
{{- if (.Param "ShowWordCounts") -}}
{{- $scratch.Add "meta" (slice (default (printf "字数: %d字" .WordCount))) }}
{{- end }}
<!-- 大概需要花费的阅读时间 -->
{{- if (.Param "ShowReadingTime") -}}
{{- $scratch.Add "meta" (slice (default (printf "时长: %d分钟" .ReadingTime))) }}
{{- end }}
<!-- 作者 -->
{{- with (partial "author.html" .) }}
{{- $scratch.Add "meta" (slice .) }}
{{- end }}
<!-- 分隔方式 -->
{{- with ($scratch.Get "meta") }}
{{- delimit . " | " -}}
{{- end -}}
各种配置参考下面的文章:
折腾papermod主题
papermod主题github仓库wiki
要拥有多个博客网站,必须得拥有多个github pages,具体可以参考下面这篇文章:
如何拥有多个Github Pages
主要内容节选:
1
2
3
4
5
6
7
8
9
10
11
12
13
14
15
16
17
18
19
20
21
22
搭建了自己的第一个GitHub Pages页面后,可能很多人会有和我一样的想法——**搭建多个GitHub Pages页面**。这些新的页面可以作为博客页面的demo,也可以用来放一些不想放在主要博客的内容(比如ACG相关、日常生活,当然也有人不介意放在一起)。
但是我以前一直以为,**每个GitHub账户只能拥有一个GitHub Pages页面**,所以这个想法一直没有实施。后来发现其实不是这样的。正确的说法是这样的——**我们只能为每个 GitHub 帐户创建一个用户或组织站点;而项目站点没有限制**。
我所认为的只能拥有一个的,是个人站点,也就是名为 `<user>.github.io` 的仓库。**想要创建更多的GitHub Pages页面,可以通过创建项目站点实现。**项目站点的数量没有限制。
** [GitHub Pages 站点的类型 ](https://link.zhihu.com/?target=https%3A//docs.github.com/cn/github/working-with-github-pages/about-github-pages%23 )**对此有清晰的说明,这里我把关键段落抄了过来:
有三种类型的 GitHub Pages 站点:项目、用户和组织。 项目站点连接到 GitHub 上托管的特定项目。 用户和组织站点连接到特定的 GitHub 帐户。
要发布用户站点,必须创建名为 `<user>.github.io` 的用户帐户所拥有的仓库。 要发布组织站点,必须创建名为 `<organization>.github.io` 的组织所拥有的仓库。 除非您使用自定义域,否则用户和组织站点位于 `http(s)://<username>.github.io` 或 `http(s)://<organization>.github.io` 。
项目站点的源文件与其项目存储在同一个仓库中。 除非您使用自定义域,否则项目站点位于 `http(s)://<user>.github.io/<repository>` 或 `http(s)://<organization>.github.io/<repository>` 。
您只能为每个 GitHub 帐户创建一个用户或组织站点。 项目站点(无论是组织还是用户帐户拥有)没有限制。
## **创建项目**
1. 新建一个仓库,名称随意。
2. 进入仓库主页,点击右面的`Settings` ,找到**GitHub Pages**部分,选择`Launch automatic page generator` >`Continue to layouts` >`Publish page` 即可。(注意这里需要选择一个主题,之后可以再改,不选择的话页面可能会无法加载,显示`“There isn't a GitHub Pages site here.”` )
3. 建议勾选 `Enforce HTTPS` ,否则访问时会出现安全警告。
4. 没有出错的话,一个项目主页就建立完成了,可以通过`<username>.github.io/<projectname>` 访问到了
B站up主北屿小智障说可以利用多仓库即一个私有仓库和一个公共仓库来搭建博客,这样安全性最高,但我没能用github actions实现,留待以后再折腾!